

Guide on Jobs in Dagster
Start your free 7-days trial now!
What are Dagster jobs?
In Dagster, a job will either:
materialize a set of assets.
execute a graph of ops.
In this guide, we will focus on the first use case, which is more common.
Setting up the environment
Let's first start by setting up the Dagster environment just as we did in our Getting Started with Dagster guide. Suppose our project structure is as follows:
my_dagster_code_location├── __init__.py└── my_assets.py
Where my_assets.py is:
Defining a single job using assets
Let's now define a job that materializes all our assets. Suppose the __init__.py has the following content:
                    from dagster import Definitions, load_assets_from_modules, define_asset_jobfrom . import my_assets
all_assets_job = define_asset_job(name="all_assets_job")all_assets = load_assets_from_modules([my_assets])
defs = Definitions(    assets=all_assets,    jobs=[all_assets_job])
Here, we're simply specifying the name of the job ("all_assets_job"). By default, a job will materialize all assets - we will later demonstrate how to define jobs that materialize only a subset of assets.
Jobs that materialize assets are called asset jobs.
Displaying and executing a job using Dagster UI
Now, head over to the Dagster UI by using the following command:
dagster dev -m my_dagster_code_location
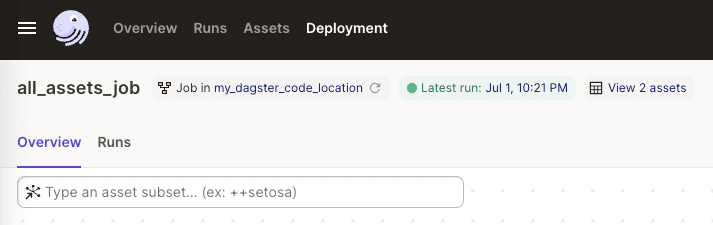
We should see our job all_assets_job at the top:
Next, click on the hamburger icon at the top-left corner:

Here, we can see all the jobs that we define!
There is another location in the UI where we can see our jobs. Click on Deployment in the header, and then click on our code location. Next, select the Jobs tab to see the list of jobs:

Let's now run our all_assets_job. Click on all_assets_job and then click on the Materialize all button at the top-right corner. We should then see the following new run under the Runs tab:

Notice how the Target shows that the run has executed our all_assets_job.
All Dagster runs are executed via jobs regardless of whether or not we explicitly define the jobs. For instance, suppose we define only the assets:
                    from dagster import Definitions, load_assets_from_modulesfrom . import my_assets
all_assets = load_assets_from_modules([my_assets])defs = Definitions(assets=all_assets)
Load up the Dagster UI, and then click on Materialize all:

In our terminal, observe how Dagster created a temporary job called __ASSET_JOB to execute for this run:
2023-08-05 00:07:16 +0800 - dagster - DEBUG - __ASSET_JOB - 0de67607-f765-483e-9e30-ff0dc7e7bf9b - 11870 - RUN_START - Started execution of run for "__ASSET_JOB".2023-08-05 00:07:16 +0800 - dagster - DEBUG - __ASSET_JOB - 0de67607-f765-483e-9e30-ff0dc7e7bf9b - 11870 - ENGINE_EVENT - Executing steps using multiprocess executor: parent process (pid: 11870)...
Defining multiple jobs using assets
Let's now create another job that materializes only a specific set of assets:
                    from dagster import Definitions, load_assets_from_modules, define_asset_jobfrom . import my_assets
all_assets_job = define_asset_job(name="all_assets_job")asset_iris_data_job = define_asset_job(name="asset_iris_data_job", selection="iris_data")
all_assets = load_assets_from_modules([my_assets])
defs = Definitions(    assets=all_assets,    jobs=[all_assets_job, asset_iris_data_job],)
In the Dagster UI, click on the hamburger icon to see all our jobs:

Click on asset_iris_data_job - we should then be able to see the following graph:

Here, only the iris_data asset is shown because this job only targets this asset.
If we click on Materialize, only the target assets will be materialized:

Defining a job using a decorator
Previously, we defined a job using the define_asset_job(-) method in our __init__.py. Another way to define a job is to use the @job decorator. Suppose we have a my_job.py file where we define a job that prints a number:
                    from dagster import job
@jobdef print_number():    print(5)
Copy and paste the following content into __init__.py:
                    from dagster import Definitionsfrom .my_job import print_number
defs = Definitions(jobs=[print_number])
Here, instead of using the define_asset_job(-) method, we directly imported the job that we defined in the my_job module.
In the Dagster UI, navigate to Deployment and then Jobs - we should be able to see the job that we defined:

Let's now execute this job via a run. Click on our job, and then click on the Launchpad tab:

Click on the Launch Run button at the bottom right corner to execute the job.
Executing a job from the command line
Once again, suppose we have a my_job.py file with the following content:
                    from dagster import job
@jobdef print_number():    print(5)
We can execute this job using the command line like so:
                    dagster job execute -f ./my_dagster_code_location/my_job.py


            52023-07-02 23:48:47 +0800 - dagster - DEBUG - print_number - ae23a7a9-815e-486a-a62a-d312dd9c4bfd - 13275 - RUN_START - Started execution of run for "print_number".2023-07-02 23:48:49 +0800 - dagster - DEBUG - print_number - ae23a7a9-815e-486a-a62a-d312dd9c4bfd - 13275 - ENGINE_EVENT - Executing steps using multiprocess executor: parent process (pid: 13275)...
Executing a job using Python
Once again, suppose we have the following my_job.py file:
                    from dagster import job
@jobdef print_number():    print(5)
In our main.py file, suppose we have the following code:
                    from my_job import print_number
if __name__ == "__main__":    result = print_number.execute_in_process()
Running this Python file will trigger a run:
                    python my_dagster_code_location/main.py


            52023-07-02 23:55:38 +0800 - dagster - DEBUG - print_number - 93d3031c-983e-49f0-a75e-33a624dbf382 - 13674 - RUN_START - Started execution of run for "print_number".2023-07-02 23:55:38 +0800 - dagster - DEBUG - print_number - 93d3031c-983e-49f0-a75e-33a624dbf382 - 13674 - ENGINE_EVENT - Executing steps in process (pid: 13674)
Once again, we will be able to see the run information in Dagster UI.